Install PixlStash
Pick the method that suits your setup and follow the steps below.
Desktop App
A native PixlStash window for Windows, macOS, and Linux: no Python, Node.js, or browser tab required. The app auto-detects your hardware and downloads a matching AI backend (NVIDIA, experimetal AMD or CPU) on first run.
Grab the installer for your platform from the
latest release on GitHub: .exe (Windows), .dmg (macOS, Apple
Silicon), or .AppImage/.deb
(Linux).
On first run, PixlStash detects your hardware and recommends a compute backend (the Python + AI runtime). The download is a few hundred MB to a few GB depending on the backend; it is fetched once and reused.
The window opens straight into your library. There is no login prompt for the local user. Your data lives in the standard per-user location, so it is shared with a pip or Docker install on the same machine. You can switch or update backends any time from Backends → Compute Backends….
Linux: make the AppImage executable
A freshly downloaded .AppImage won't launch until
you mark it executable. Either
right-click → Properties → Permissions → Allow executing file
as a program, or run chmod +x PixlStash-*.AppImage in a
terminal, then double-click it (or run
./PixlStash-*.AppImage). The
.deb package installs normally and needs no extra
step.
On newer distributions (e.g. Ubuntu 24.04) the AppImage may
also need FUSE 2, which isn't installed by
default. If you see an error mentioning
libfuse.so.2 or
"AppImages require FUSE to run", install it with
sudo apt install libfuse2 (Debian/Ubuntu) or your
distro's equivalent. As a one-off alternative you can run
./PixlStash-*.AppImage --appimage-extract-and-run,
which doesn't need FUSE.
macOS: Apple Silicon only
The macOS build is for Apple Silicon Macs (M1
and later); Intel Macs are not currently supported, but you can
run PixlStash on them via the pip package or Docker. Open the
.dmg and drag PixlStash into your
Applications folder, then launch it.
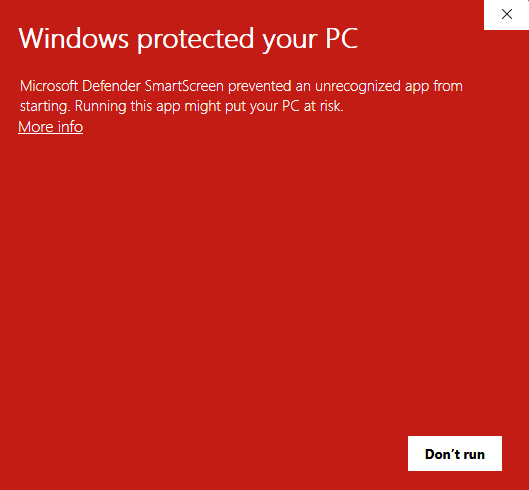
⚠️ Windows SmartScreen warning
Because the installer is not yet signed with a paid code-signing certificate, Windows SmartScreen may show a red "Windows protected your PC" dialog. This is expected. Click More info and then Run anyway to proceed.
Server Installer for Windows
The easiest way to get started with the server on Windows. No Python or Node.js required.
Go to the
latest release on GitHub
and download the .exe installer.
Double-click the downloaded .exe and follow the
prompts.
Use the PixlStash Server shortcut in the Start Menu, then open your browser to:
http://localhost:9537
⚠️ Windows SmartScreen warning
Because the installer is not yet signed with a paid code-signing certificate, Windows SmartScreen may show a red "Windows protected your PC" dialog. This is expected. Click More info and then Run anyway to proceed.
Docker
A pre-built image is published to the GitHub Container Registry on every release. No clone required. Works on Linux, MacOS, and Windows. AI inference runs on CPU by default; GPU is optional.
Download and install Docker Desktop (Windows / macOS) or Docker Engine (Linux).
Run this one command. No data is saved after you stop it (CPU inference only):
docker run --rm -e PIXLSTASH_HOST=0.0.0.0 -p 9537:9537
                    ghcr.io/pikselkroken/pixlstash:latest
Everything is discarded when the container exits.
First, create the storage folder so it is owned by your user (if Docker creates it, it will be owned by root and the container won't be able to write to it):
mkdir -p ~/Pictures/pixlstash
Then start the container:
docker run -d \ --user $(id -u):$(id -g) \ -e
                    HOME=/home/pixlstash \ -e PIXLSTASH_HOST=0.0.0.0 \ -p
                    9537:9537 \ -v ~/Pictures/pixlstash:/home/pixlstash \ --name
                    pixlstash \ ghcr.io/pikselkroken/pixlstash:latest
Replace ~/Pictures/pixlstash with whatever folder
you want to store your data in.
The chosen folder will be mapped to the container's internal
folder /home/pixlstash, which PixlStash uses for
all its data storage. This means that all your pictures, tags,
characters, stacks, and settings will be saved to the provided
folder and persist even if you stop or remove the container.
The --user $(id -u):$(id -g) flag runs the
container process as your host user, so it can read and write
the folder you created above without needing any extra
permission changes.
http://localhost:9537
latest with
a version tag, e.g.
ghcr.io/pikselkroken/pixlstash:0.9.5.
--restart unless-stopped to your
docker run command, right after -d:
--restart unless-stopped
To enable GPU inference with NVIDIA (Linux / WSL2)
Skip this section if you are happy with CPU inference. To use your NVIDIA GPU, first install the NVIDIA Container Toolkit:
distribution=$(. /etc/os-release; echo $ID$VERSION_ID) curl
                  -fsSL https://nvidia.github.io/libnvidia-container/gpgkey \ |
                  sudo gpg --dearmor -o
                  /usr/share/keyrings/nvidia-container-toolkit-keyring.gpg curl
                  -sL
                  "https://nvidia.github.io/libnvidia-container/$distribution/libnvidia-container.list"
                  \ | sed 's#deb https://#deb
                  [signed-by=/usr/share/keyrings/nvidia-container-toolkit-keyring.gpg]
                  https://#g' \ | sudo tee
                  /etc/apt/sources.list.d/nvidia-container-toolkit.list sudo
                  apt-get update && sudo apt-get install -y
                  nvidia-container-toolkit sudo nvidia-ctk runtime configure
                  --runtime=docker sudo systemctl restart docker
On Windows, install WSL2 with an NVIDIA Windows driver ≥ 525, then run the same commands inside your WSL2 distro.
Run the following commands to verify that Docker can access your NVIDIA GPU:
docker run --rm --gpus all
                  nvidia/cuda:12.8.1-base-ubuntu24.04 nvidia-smi
Create the storage folder first if you haven't already (so it is owned by your user, not root):
mkdir -p ~/Pictures/pixlstash
Then start the container:
docker run -d \ --runtime nvidia \ --user $(id -u):$(id -g) \
                  -e HOME=/home/pixlstash \ -e NVIDIA_VISIBLE_DEVICES=all \ -e
                  NVIDIA_DRIVER_CAPABILITIES=compute,utility \ -e
                  PIXLSTASH_HOST=0.0.0.0 \ -p 9537:9537 \ -v
                  ~/Pictures/pixlstash:/home/pixlstash \ --name pixlstash \
                  ghcr.io/pikselkroken/pixlstash:latest-gpu
Replace ~/Pictures/pixlstash with whatever folder
you want to store your data in.
pip + Virtual Environment
Install from PyPI. Requires Python 3.10 or newer. Using a virtual environment is strongly recommended.
python -m venv venv
Linux / macOS
source venv/bin/activate
Windows
venv\Scripts\activate
pip install pixlstash
pixlstash-server
http://localhost:9537
Run as a systemd service (Linux)
To have PixlStash start automatically on boot, create a systemd
unit file. Replace YOUR_USERNAME and
/path/to/venv with your actual values.
[Unit]

                  Description=PixlStash Server

                  After=network.target


                  [Service]

                  Type=simple

                  User=YOUR_USERNAME

                  ExecStart=/path/to/venv/bin/pixlstash-server

                  Restart=on-failure

                  RestartSec=5


                  [Install]

                  WantedBy=multi-user.target
Save it to
/etc/systemd/system/pixlstash.service, then enable
and start it:
sudo systemctl daemon-reload && sudo systemctl enable
                  --now pixlstash
Clone & Run from Source
Run directly from the Git repository. Requires Python 3.10+, Node.js 20+, and npm.
git clone https://github.com/pikselkroken/pixlstash.git cd
                  pixlstash
python -m venv venv
Linux / macOS
source venv/bin/activate
Windows
venv\Scripts\activate
pip install --upgrade pip pip install -e .
cd frontend && npm ci && npm run build && cd ..
pixlstash-server
http://localhost:9537
Run as a systemd service (Linux)
To have PixlStash start automatically on boot, create a systemd
unit file. Replace YOUR_USERNAME and
/path/to/venv with your actual values (the path to
the venv directory you created in step 2).
[Unit]

                  Description=PixlStash Server

                  After=network.target


                  [Service]

                  Type=simple

                  User=YOUR_USERNAME

                  ExecStart=/path/to/venv/bin/pixlstash-server

                  Restart=on-failure

                  RestartSec=5


                  [Install]

                  WantedBy=multi-user.target
Save it to
/etc/systemd/system/pixlstash.service, then enable
and start it:
sudo systemctl daemon-reload && sudo systemctl enable
                  --now pixlstash
GPU Acceleration (optional)
Skip this section if you are happy with CPU inference. To use your NVIDIA GPU, install CUDA 12.8 and the matching PyTorch and ONNX Runtime packages.
Install or update your NVIDIA driver (must support CUDA 12.x), then install the CUDA 12.8 Toolkit for your OS. Verify the installation:
nvcc --version nvidia-smi
pip install torch torchvision --force-reinstall --index-url
                  https://download.pytorch.org/whl/cu128
pip uninstall -y onnxruntime pip install
                  onnxruntime-gpu
Linux / macOS
python - <<EOF import torch print("CUDA
                      available:", torch.cuda.is_available()) EOF
Windows
py -c "import torch; print('CUDA available:',
                      torch.cuda.is_available())"
Then set "default_device": "cuda" in your
server-config.json to enable GPU inference.